Diana Wild Rift Build & Guide
Best Diana Wild Rift build guide for Season 11 Patch 5.0 of WR. With our Diana guide you will learn which items to build, runes to select, skill order, who counters Diana, and how to use abilities properly.
Recommended Builds
Starting Item

Boots
Core Items
Complete Build
Runes


Starting Item
Boots
Core Items
Complete Build
Runes


Diana is a warrior of the Lunari. Bearing her crescent Moonsilver Blade and her shimmering armor, she is the living embodiment of the silver moon’s power. Diana is a mid lane AP fighter/assassin capable of bursting down enemies, dealing magic DPS and creating big team fight opportunities for her team.
Diana Wild Rift Build Recommendation
Here are Item Build Recommendations that works on this champion and which are the best build for Diana Wild Rift in this patch.
Lunar Fighter


![Void Staff [This item has been removed from WR]](https://lolwildriftbuild.com/wp-content/uploads/2020/10/Void_Staff.jpg)
This Diana Wild Rift build balances offense and defense. This is the recommended build for beginners as the added HP and sustain will help her fight her enemies head-on. This enables her to assassinate key targets and still manage to get out of it due to her defenses. Riftmaker also allows her to duel even against tanky champs, thanks to true damage.
Lunar Assassin

This Diana Wild Rift build deals a lot more damage than the fighter build in exchange for less survivability and sustain. This build is harder to use but is more rewarding which makes it perfect for advanced users.
Runes for Diana in Wild Rift
For the runes, you may opt for Conqueror or Electrocute. Stacking up Conqueror is just an easy task for Diana with her set of attacks. It grants adaptive damage, which in turn also adds up omnivamp. Electrocute on the other hand is great for assassin Diana allowing you to eliminate all if not, most of your foes’ HP instantly.
Spells
These two are the best spells you can equip for Diana in Wild Rift.
Ignite‘s true damage and Grievous Wounds effect will help you secure your kills in the early stages of the game.
Since your mobility tool, 3rd, Lunar Rush can only be targeted to enemies, it provides limited defensive options and so Flash is needed so you’ll have a fool proof escape option.
Skill Order

1
4
6
7

2
8
10
11

3
12
14
15

5
9
13
1st, Crescent Strike is maxed first as it is Diana’s main source of damage and wave clear. 2nd, Pale Cascade is maxed next as it provides a balanced amount of damage and survivability. 3rd, Lunar Rush is maxed last as its cooldown is the same as long as it removes Moonlight and its attack speed scaling is used more in the later stages of the game. Get a point in your ultimate whenever possible.
Abilities

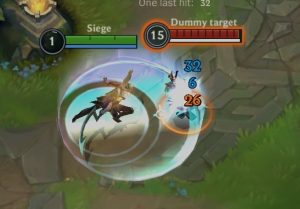
Every third attack deals 30 bonus magic damage (30 + 60% AP) in an area.
Deals 50% damage to structures.
Unleashes an arcing bolt of energy that deals 60 magic damage (60 + 70% AP) and applies Moonlight for 3 seconds.
Creates 3 spheres that orbit Diana for 5 seconds. Upon contact with enemies the sphere detonate, dealing 25 magic damage (25 + 20% AP).
Also grants a shield that absorbs 40 damage (40 + 40% AP) damage. If the third sphere detonates, the shield is increased by 40 (40 + 40% AP).
Dashes to a point near an enemy, dealing 40/75/110/145 magic damage (50 + 25% AP) and removing Moonlight in an area. Diana’s next 3 attacks gain 45% Attack Speed for 4 seconds.
Lunar Rush’s Cooldown is reduced to 0.5 seconds if it removes Moonlight from an enemy.
Hold: Summons the moon, slowing enemies by 20% and applying Moonlight in a growing area.
Cast: Slams the moon down, spiraling enemies toward Diana and dealing 150 (150 + 35% AP) to 300 magic damage (300 + 70% AP) (scaling with charge time).
Abilities Analysis
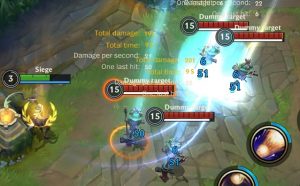
Innate Passive: Moonsilver Blade
Every third attack of Diana deals additional magic damage around her.
If you want to burst down your target, attack minions or jungle monsters twice before engaging your target. When Moonsilver Blade is going to activate, Diana will glow white. You have to activate the third attack within four seconds or else the attack counter will reset.
Moonsilver Blade adds a good amount of magic DPS when you are continuously attacking enemies especially when you have the bonus attack speed from using your abilities.
As of Patch 2.2b, the bonus attack speed effect from 3rd, Lunar Rush is transferred to Diana’s passive. Now, all of Diana’s abilities grant bonus attack speed after casting.
As of Patch 2.5, Moonsilver Blade now deals 110% damage to jungle monsters.
Q | 1st: Crescent Strike
Crescent Strike unleashes an arcing bolt that deals magic damage and applies Moonlight which is an important effect for your 3rd, Lunar Rush. Hitting multiple targets with this ability to apply Moonlight is a crucial part of playing Diana.
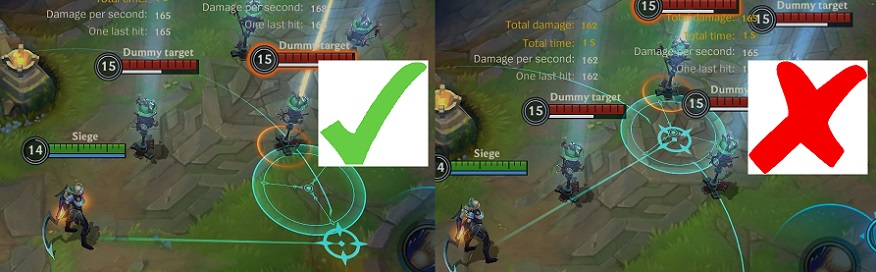
If you want to hit minions or enemy champions in a relatively straight line, stand towards the left side of your target. The end of Crescent Strike’s projectile expands into a circle so you’ll generally want to target your lane opponent with the circular end for a bigger chance of hitting them.
If you don’t want to push your wave, for example, when freezing near your turret, and you want to zone or poke the enemy champion, stand at the right side of the minion so that the ability will arc away from the minions.
Crescent Strike reveals the target area even before the projectile reaches the target and targets hit will stay revealed as long as they have Moonlight.
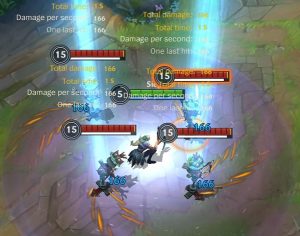
W | 2nd: Pale Cascade

Diana creates three orbs that orbit Diana. The spheres grant a shield and detonate upon contact with an enemy, dealing magic damage. Once all the spheres detonate, Pale Cascade will grant an additional shield to Diana.
Pale Cascade allows Diana to survive harass during the laning phase as a melee mid laner. Activate it in anticipation of your enemy laner’s poking abilities.
The orbs deal a good amount of damage especially if all three of them hit a single enemy champion. Your 3rd, Lunar Rush makes you dash to an enemy so it is the best way to detonate all three orbs quickly.
If you are going to use Pale Cascade to damage an enemy champion. Do not activate it immediately as it will signal the enemy that you are going to dash to them. What you should do is to throw your 1st, Crescent Strike to the enemy (preferably with a Moonsilver Blade ready), then immediately dash with your 3rd, Lunar Rush, and before the moment that you will collide with your target, activate Pale Cascade.
Why should you go through the hassle of activating Pale Cascade before you reach your target? It’s because there is a high chance that the orbs will collide on minions or other champions that are not your target on your way to your target. And if you don’t pop all three orbs on a single target, your burst damage will drop.
The cooldown of Pale Cascade will only start once its duration ends or all the orbs are popped.
E | 3rd: Lunar Rush
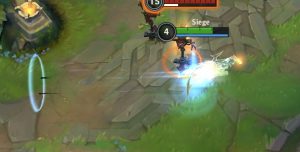
Lunar Rush makes Diana dash to a point near her target enemy, dealing magic damage and removing Moonlight. If Lunar Rush removes Moonlight, the cooldown of this ability is reduced to 0.5 seconds.
Lunar Rush, along with your 1st, Crescent Strike, is core to playing Diana. Minimize the lag time between your actions and increase your burst damage by activating Lunar Rush as soon as 1st, Crescent Strike is halfway from hitting the target. Of course, this requires a decent amount of skill expression because you’ll be penalized with Lunar Rush’s cooldown if your 1st, Crescent Strike fails to hit your target.
You can dash non-stop as long as there is Moonlight in the vicinity. A key trick to maximizing the number of dashes you make is to dash at the far side of those with Moonlight. This will minimize the chance of removing multiple Moonlights.
Ideally, you should be able to use Lunar Rush at least twice in a single 1st, Crescent Strike cast. But in the right situation and with enough proficiency, you’ll be able to jump up to four times in a single cast of 1st, Crescent Strike without putting your Lunar Rush in its long cooldown. And together with your ultimate, Moonfall, you’ll be able to jump a minimum of three times and a maximum of 6 times, 8 times even, in a single fight together with a cast or two of 1st, Crescent Strike.
You can either cast Lunar Rush on a single target multiple times to increase your damage output or jump from target to target to confuse enemies and potentially bait and dodge their abilities. Remember to auto-attack in between your dashes so you’ll be able to make use of the attack speed bonus from this ability and to activate your passive, Moonsilver Blade as much as possible.
You can jump on jungle monsters on the other side of walls to escape as your 1st, Crescent Strike reveals the area where you target it.
Moonlight lasts for three seconds and if you are taking down a turret, cast your 1st, Crescent Strike on minions then dash once using your Lunar rush then as soon as you land three attacks or before the Moonlight disappear dash again to maximize the attack speed bonus.
R | Ultimate: Moonfall
Moonfall is a burst damage crowd control ability. At its simplest form, you can use it to burst down a single target but if you can get four or five enemy champions, it’s most likely GG for the enemy team. It’s that strong as a team fighting ability, especially if your allies have strong AoE abilities as well.
You have to hold the ability button of Moonfall to increase its damage output and you should charge it as much as possible and release it if an enemy is about to exit its effective range. But if the enemy has a blink-type ability, it’s better to burst them down with a quick tap of Moonfall.
The spiraling effect towards Diana which activates once Moonfall is unleashed is considered an Airborne effect so it will interrupt the enemy’s current action whether its attacking or casting ability, and it will allow Yasuo to use his ultimate, Last Breathe on targets you have affected with your ultimate.
Combos:
Short Trade/ In-out combo: This combo is great for bursting down an enemy in the backline or for doing short trades in the lane. Only use this ability if you are sure that you won’t be CC’d to death.
[AA x 2 Moonsilver Blade prep] + 1st + 3rd (to target)+ 2nd + AA + 3rd (to minion in a safe area to disengage)
Full Burst combo: This combo is for using all your abilities to kill the enemy’s high priority champion which is usually the ADC, APC, or Support.
[AA x 2 Moonsilver Blade prep] + 1st + 3rd + 2nd + [AA + AA + AA] + Ult + 3rd + AA + AA + AA
Diana Early Game Guide
As a melee champion, you should respect range champions in the middle lane and play it safe and simply farm by last hitting minions using your 1st, Crescent Strike and keep your HP up by using your 2nd, Pale Cascade when you can’t avoid the enemy’s ranged pokes.
If the enemy uses their crowd controls or most damaging abilities and miss you, you can attempt to do a short trading combo to punish their mistake. Repeat until they have half health and if they do not recall with a dangerous health level, burst them down once you acquire your ultimate at level 5.
If you are facing melee champions, use your 1st, Crescent Strike, and 3rd, Lunar Rush to jump to their location and then jump to other minions if they use their abilities so you can bait their abilities. You can safely do this and add additional damage by timing your 2nd, Pale Cascade well.
Diana Late Game Guide
In the later stages of the game, generally, you’d want to enter the fight late as the clean-up crew. You can easily jump from one champion to another and finish them off one by one using your 1st, Crescent Strike, and 3rd, Lunar Rush.
But if the opportunity arises that you see three or more enemy champions grouped together, do not hesitate to initiate the fight with your full combo. Just make sure that your allies can immediately follow up on your initiation when you do this.
Do not underestimate’s Diana’s pushing capabilities thanks to her passive, Moonsilver Blade and attack speed bonus from her 3rd, Lunar Rush.
Synergies
It is highly recommended using Diana in Wild Rift with the following champions as they synergize well with her.

Leona’s Solar Flare is much more devastating when it hits multiple enemies and Diana’s Moonfall makes this happen more often. A well-executed wombo-combo from these two can break the game and even turn a hard loss into a sure win.

Diana’s Moonfall is an easy setup for Yasuo’s Last Breathe. This two are a high mobility, high damage Mid and Baron lane combination.

Amumu’s Cursed Touch passive will turn a portion of Diana’s magic damage into true damage and their ultimates are also a game-breaking combination.
All Diana Wild Rift Counter Champions
In this section, we’ll tackle some of Diana Wild Rift Counters.

The Queen of Mid lane, Orianna, remains untouched once again in this patch and she is a pain to face in the laning phase thanks to her long constant pokes and she is near impossible to burst down thanks to her shields. Keep your head down and play it safe until you are strong enough to make more impact than her. If you lose too much and give her early game kills, it will be an extremely hard game.

Lulu will turn you into a critter in the middle of your dashes and her defensive abilities will make it hard for you to kill your targets. Wait for her to use her 2nd, Whimsy as a buff before jumping into the fight and preferably, if possible, kill her first.
Pros & Cons About Diana
Here are some pros and cons if you are playing with Diana in Wild Rift.
Pros
- Diana is a flexible Fighter/Assassin which can be played either as a bruiser or as a full burst assassin. She deals a lot of burst and sustained damage which allows her to carry games on her own played she is played to her strengths.
- Unlike other assassins, she can initiate fights and survive thanks to her ultimate, Moonfall and shield, 2nd, Pale Cascade. She also has potentially unlimited mobility from the combination of her 1st, Crescent Strike and 3rd, Lunar Rush.
- She can also push lanes and take down turrets really fast.
Cons
- Diana is a high skill expression champion. There is a lot of possibilities in her kit but it also makes her extremely unforgiving to play. If you misses her 1st, Crescent Strike or used her 3rd, Lunar Rush in a wrong way, she can die easily as she has no other escape mechanism except for her Flash.
- Her early game is on the weaker side and she has little satisfying play options before she gets her ultimate.
- Diana’s options are highly limited by the enemy’s positioning and game situation which makes it extremely hard for beginners to learn and adjust to her playstyle.
FAQ's About Diana in Wild Rift
How good is Diana in Wild Rift?
Diana is an (Tier S+) champion. Her Lunar Rush mechanics can be unforgiving if you make the mistake of jumping to someone without Moonlight but if you master her, she is capable of winning games all by herself.
What role / lane should I play with Diana in Wild Rift?
Diana is mostly played in the mid lane as an AP type fighter/assassin. She can also be played as an off meta Baron laner or jungler but she is not as effective when playing as those roles.
What abilities do I level up with Diana?
1st, Crescent Strike is maxed first as it is Diana’s main source of damage and wave clear. 2nd, Pale Cascade is maxed next as it provides a balanced amount of damage and survivability. 3rd, Lunar Rush is maxed last as its cooldown is the same as long as it removes Moonlight and its attack speed scaling is used more in the later stages of the game.
What items should I build with Diana?
Diana’s core items as a fighter is Rod of Ages and Hextech Gunblade for balanced damage and survivability. As an assassin, Lich Bane and Infinity Orb grants her access to more burst damage.
What Runes should I use when playing as Diana?
As a fighter, use Conqueror which grants bonus AP for each instance of damage you deal to enemy champions. Once you have stacked this rune to the max, you will gain 10% more damage output. Her other runes are Hunter – Vampirism, Hunter – Titan, and Hunter – Genius. As an assassin, use Electrocute which deals bonus damage to an enemy champion who you have landed a three hit combo. The additional damage increases your total burst damage done to a single target.
How can I maximize the use of my E, Lunar Rush on Diana?
Practice to increase your accuracy with using your 1st, Crescent Strike and when using 3rd, Lunar Rush, target to the side of those with Moonlights to maximize your 3rd, Lunar Rush resets.